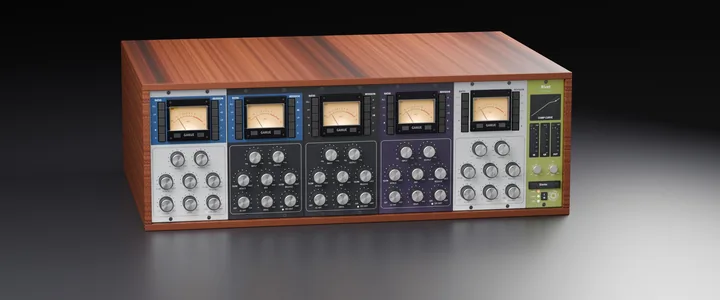
How to Use a Compressor With No Threshold Knob
Input-driven FET-style compression in plain steps: drive INPUT, match with OUTPUT, choose ratio and timing. Worked through on the free Rivet plug-in.
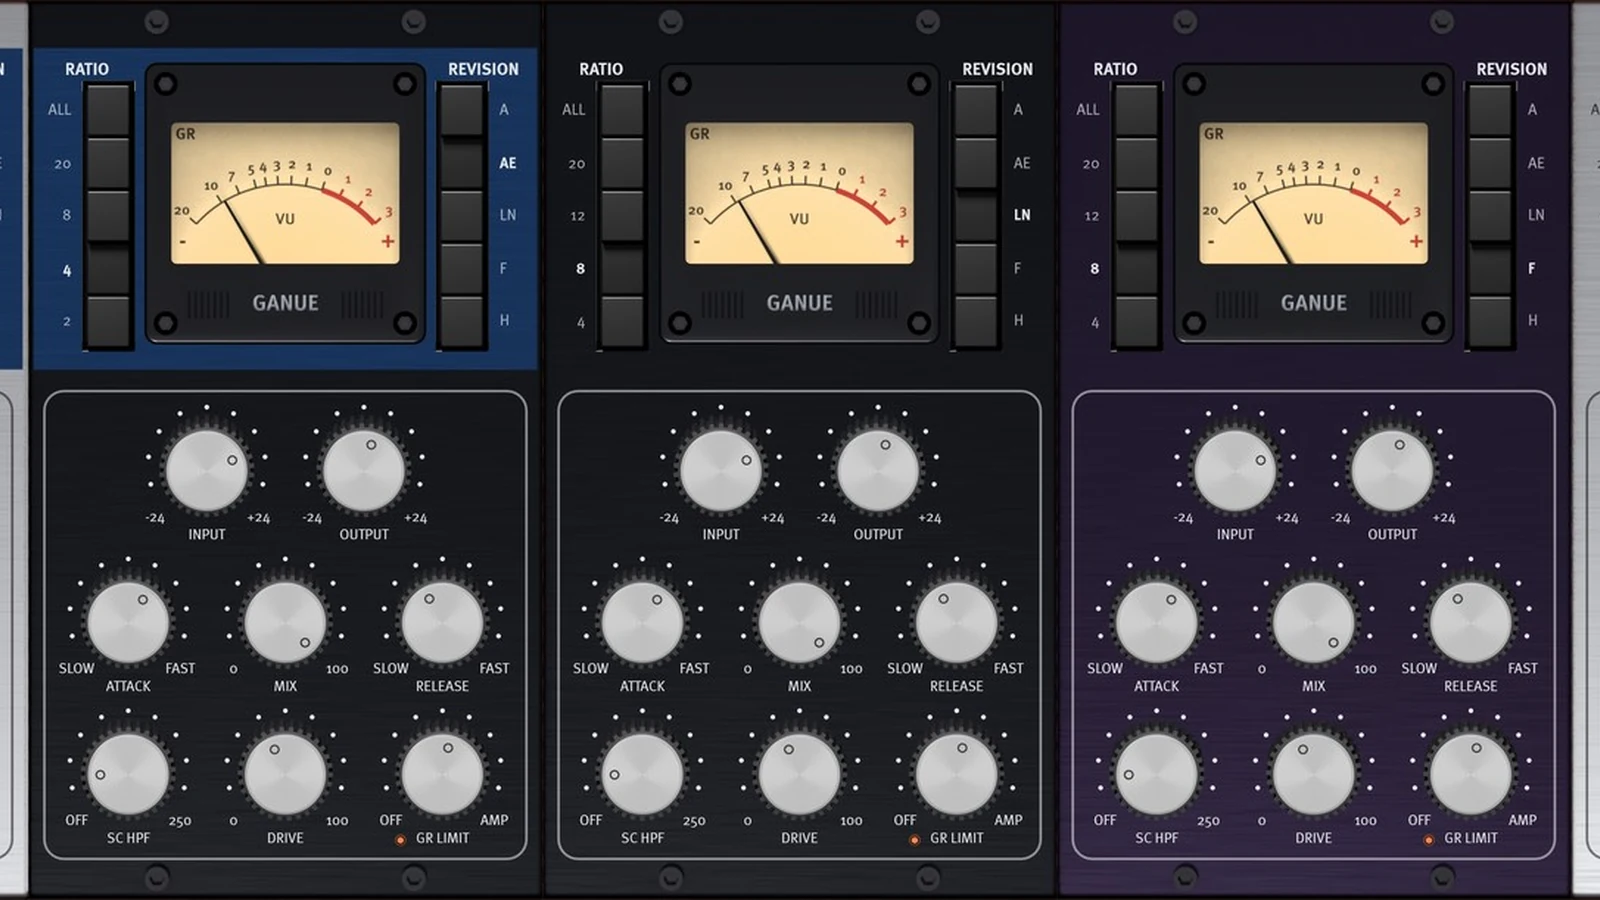
Some compressors have no threshold control at all. The panel shows two large knobs, INPUT and OUTPUT, a row of ratio buttons, and two small timing knobs. If you learned compression on a design with a threshold, this layout can look like something is missing.
Nothing is missing. The threshold is fixed inside the unit, and you move the signal up to meet it. This guide walks through that workflow on Rivet, our free FET-style compressor, but the method applies to any input-driven design.
The idea: move the signal, not the threshold
On a threshold-style compressor you leave the signal where it is and lower a line until the loud parts cross it.
On an input-driven compressor the line does not move. INPUT raises the signal into the compressor. The more you raise it, the more of the signal is above the fixed point, and the more gain reduction you get. OUTPUT then sets the level back to where the track sat before.
So the two knobs do three jobs between them:
- INPUT sets how much compression happens.
- INPUT also sets how hard the circuit is driven, which is where the character comes from.
- OUTPUT sets the final level.
On Rivet both knobs run from -24 to +24 dB and both start at 0. INPUT at 0 does not mean "no compression": depending on how loud the track is, the meter may already move at the default setting. Read the meter, not the knob position.
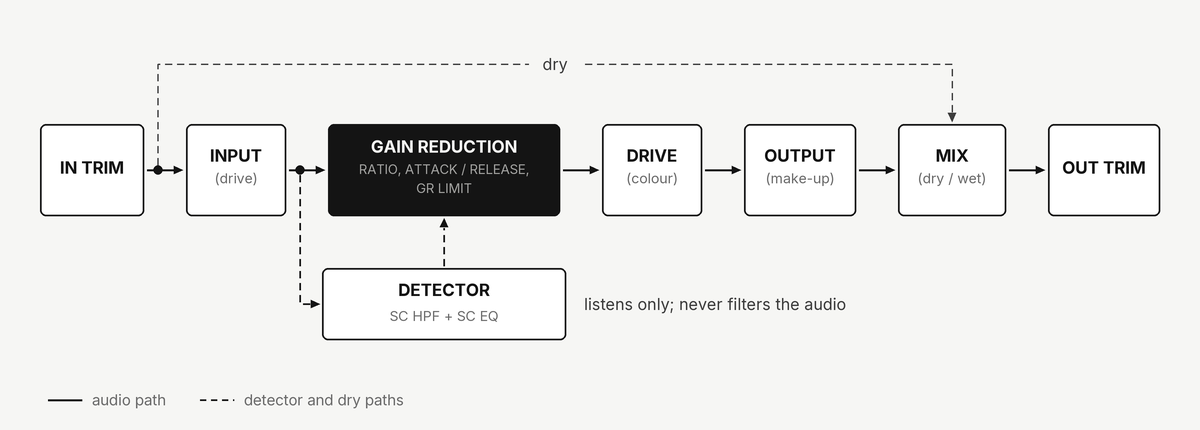
The loop: four steps
- Start at the defaults and play the loudest section of the track. Judge compression on the loud part, not the intro. Look at the gain-reduction meter before you touch anything.
- Turn INPUT until the meter shows what you want: up for more, down for less. As a starting point, 3 to 6 dB on the loud phrases is a moderate setting for a vocal or a bass. The meter on Rivet is a VU with about 285 ms of integration, so it shows the average movement, not every fast peak.
- Adjust OUTPUT until the bypassed and processed levels match. Usually that means turning OUTPUT up, because compression takes level away; with INPUT driven high it can mean turning it down. Let the comparison decide the direction. This step matters more than any other. A louder signal almost always sounds better in a quick comparison, so an unmatched comparison tells you about level, not about compression.
- Now listen to the difference and adjust INPUT again. Each time INPUT moves, match the level again with OUTPUT.
If INPUT runs out of useful range, change the level going in with the IN trim. Rivet has IN and OUT trims (-18 to +18 dB) around the whole strip.
Ratio: what the buttons change
Input-driven compressors usually offer a few fixed ratios on buttons. Rivet has five positions: 4, 8, 12, 20 and ALL. One of its five voicings, AE, uses a lower set: 2, 4, 8, 20 and ALL.
Two things are worth knowing before you choose.
First, the ratio also changes the knee. On Rivet the low ratios begin working early and softly, and the knee gets harder and starts later as the ratio goes up. The effective ratio runs a little under the printed number. So changing from 4 to 12 is not only "more of the same": the onset moves, and you will usually need to touch INPUT again.
Second, ALL is the all-buttons-in mode. It is the most aggressive setting, with a hard knee. Treat it as an effect, most often for drums and for parallel compression, not as "ratio 20, but more".
A simple rule: use 4 for level control you do not want to notice, 8 when the source is uneven, 12 and 20 when you want it held in place, and ALL when you want to hear the compressor.
Attack and release run backwards
On this style of compressor the timing knobs are reversed: fully clockwise is the fastest setting. Rivet marks the ends SLOW and FAST, and while you turn a knob the readout shows the real time instead of a percentage.
The ranges are short compared with a general-purpose compressor:
- ATTACK: about 17 ms at SLOW down to about 0.1 ms at FAST.
- RELEASE: about 1480 ms at SLOW down to about 67 ms at FAST.
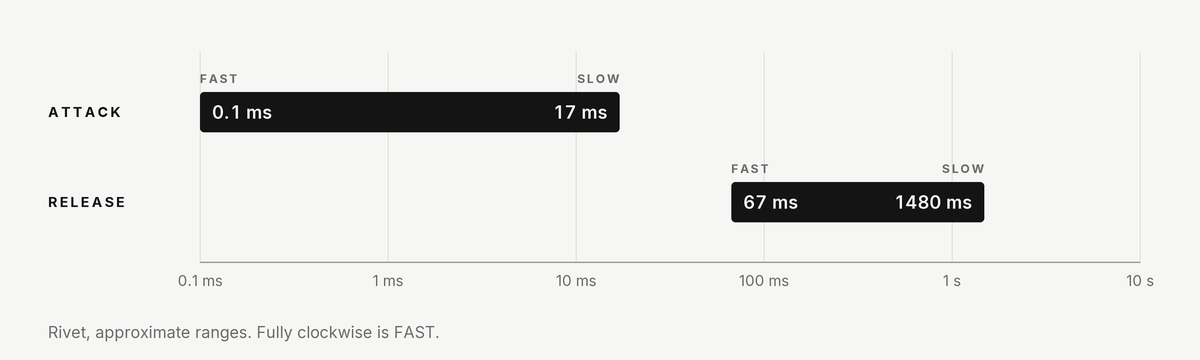
Even the slowest attack is fast. What to listen for:
- ATTACK toward SLOW lets the first few milliseconds of a note through before the gain comes down. Consonants and drum hits keep their front edge.
- ATTACK toward FAST catches the front edge as well. More control, less punch.
- RELEASE toward FAST brings the level back quickly between notes. The result is louder and denser, and it can pump on sustained low material.
- RELEASE toward SLOW holds the gain down between phrases. Smoother, but the next phrase can start already turned down.
- Both near FAST on low notes: the gain can start to follow the waveform itself, which is heard as added grit. Slow the release first if you do not want it.
Rivet's release recovers in two stages: a faster stage that the knob moves directly and a slow tail of a few seconds underneath it. Turning toward FAST also reduces how much of the recovery the slow tail carries, so the two ends of the knob differ in character and not only in speed.
Three starting points
These are places to begin, not targets. Set INPUT by the meter and by ear.
| Source | Ratio | ATTACK | RELEASE | Gain reduction on loud parts |
|---|---|---|---|---|
| Lead vocal | 4 | centre | between centre and FAST | 3 to 6 dB |
| Bass | 8 | toward SLOW | centre | 4 to 8 dB |
| Drum bus, parallel | ALL | toward SLOW | FAST | heavy, then MIX at 30 to 50 % |
For the bass, turn SC HPF up if the lowest notes pull the whole part down. It runs from 20 Hz (OFF) to 250 Hz and filters only what the detector hears, never the audio.
For the parallel drum setting, use the MIX knob instead of a separate send. It blends the compressed signal with the clean input inside the plug-in, so no extra routing is needed. 100 % is fully processed.
Four more controls worth knowing
- REVISION selects one of five voicings (A, AE, LN, F, H). It changes the ratios, the knees and the harmonic colour at once. H is the default and the cleanest. Choose it first, add colour later.
- DRIVE adds harmonic colour after the compression, from 0 to 100 %. It starts at 0.
- GR LIMIT puts a soft ceiling on how much gain reduction can happen, from about 20 dB down to 0. At the far end, marked AMP, there is no gain reduction at all and only the colour stage is left.
- Stereo mode, on stereo tracks, offers Stereo, Summed S/C, Dual Mono and Mid-Side.
Limits, stated plainly
- An input-driven compressor is not the quickest tool when you need an exact threshold in dB. The fixed point is inside the unit and the knee moves with the ratio.
- Compression and drive are tied together through INPUT. For heavy compression with the cleanest tone, stay on REVISION H with DRIVE at 0. For colour with little compression you need the extra controls (DRIVE, GR LIMIT).
- Rivet's colour stage is oversampled, 2x by default. The detector and the gain reduction run at the base rate, so very loud content near the top of the band can leave a small gain-modulation product: a 19 kHz tone at -6 dBFS reads about -89 dBc at 44.1 kHz. An optional Detector OS setting lowers that to about -105 dBc.
- With oversampling Off and the Look setting off, the latency is zero. At 2x and above the plug-in reports the filter delay to the host, and the phase bends near the top of the band because the filters are minimum-phase.